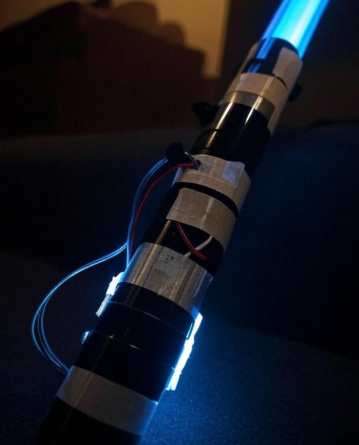
DIY Arduino Lightsaber
Custom saber with a 3D-printed hilt, motion-reactive LED blade, and synchronized sound effects. The firmware reads the MPU6050 to trigger swing and clash patterns and uses a simple state machine for modes. Power is a protected Li-ion pack feeding a buck converter and MOSFET stage for stable LED current.
Technologies Used
The Problem
Props are either static or expensive. I wanted motion-reactive light and sound with a safe, learnable power system that I could iterate on.
What I Built
A custom saber with a WS2812 LED blade, motion triggers, synchronized audio, and a 3D-printed hilt. Firmware runs a small state machine for on, idle, swing, clash, and power-down, and handles debounced inputs and timing.
Tech Notes
Arduino Nano, C/C++, MPU6050 for motion, DFPlayer Mini for audio, MOSFET switching, protected Li-ion pack with LM2596 buck. Basic thermal and wire-gauge considerations and a clean Fritzing schematic.
Current Status
Working prototype with reliable swing/clash effects and stable runtime on a single cell.
What's Next
USB-C charging board, slimmer hilt, better diffusion, and improved sound mixing.